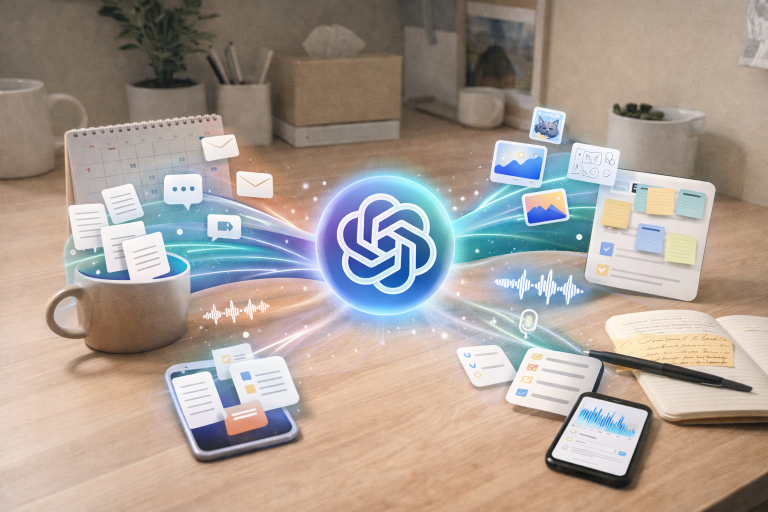

Most creators use AI in random bursts—ask ChatGPT for a title here, a hook there—and then wonder why their content still feels chaotic. A real content workflow connects idea capture, outlining, drafting, editing, and publishing into one smooth system.
In this guide, you’ll learn a practical, end‑to‑end workflow that uses ChatGPT for thinking and drafting, Notion for organization, and WordPress for publishing so you can go from idea to published post consistently.
What This Workflow Does for You
With a simple stack of ChatGPT + Notion + WordPress, you can:
- Capture and rank content ideas in one place.
- Use ChatGPT to generate outlines, first drafts, and repurposed content.
- Track every piece from “idea” to “published” with clear statuses.
- Publish faster in WordPress without losing your structure or SEO details.
This setup works whether you’re a solo blogger, YouTuber with a blog, or running a small content‑driven business.
Step 1: Set Up Your Content Hub in Notion
First, you need a single “home base” for all your content. Notion is perfect for this because it combines database views, tags, and notes.
Create a Content Database
In Notion, create a new database called Content Hub and add these key properties:
- Title – Working title of the piece.
- Type – Blog, YouTube script, email, social post, lead magnet, etc.
- Status – Idea, Research, Outlining, Drafting, Editing, Scheduled, Published.
- Primary Platform – Blog, YouTube, Newsletter, Social.
- Due Date – When you plan to publish.
- SEO Keyword / Topic – Main keyword or topic phrase.
- Category / Pillar – e.g., AI for Creators, Productivity, Tech How‑Tos.
- URL – Final WordPress link once published.
Each row (page) becomes a full workspace where you’ll paste ChatGPT prompts, outlines, and drafts.
Add Views for Clarity
Create a few helpful views:
- Kanban by Status – See pieces moving from Idea → Published.
- Calendar View – See due dates and planned publish dates.
- Filter by Type – For example, a view showing only blog posts.
This lets you quickly see what’s in the pipeline instead of digging through email threads or random docs.
Step 2: Use ChatGPT to Generate and Refine Content Ideas
With your Content Hub ready, the next step is filling it with high‑quality ideas, not just random topics.
Use ChatGPT for Structured Ideation
Start with a prompt like:
“You are a content strategist for a [NICHE] creator who publishes on WordPress and wants to grow traffic and leads over the next 90 days.
My main topics are: [LIST 3–5 TOPICS].
Generate 30 blog post ideas, grouped into 3–5 content pillars.
For each idea, include:
- Working title
- One‑sentence angle
- Suggested primary keyword.”
Paste the results into Notion:
- Each idea becomes a new row in your Content Hub.
- Fill in Type, Status = Idea, and Category/Pillar.
Now you’ve turned “vague niche” into a concrete idea bank you can prioritize.
Prioritize Ideas Inside Notion
In Notion, you can:
- Add a Priority property (High/Medium/Low).
- Quickly mark 3–5 ideas as “High” for the next sprint.
Those become your focus for the coming weeks instead of bouncing between dozens of half‑started concepts.
Step 3: Outline Posts with ChatGPT (Directly from Notion)
Once you pick a topic, open its Notion page and paste a new prompt to ChatGPT.
A Reliable Outline Prompt
Use something like:
“I’m writing a blog post for my WordPress site.
Topic: [TITLE / KEYWORD].
Audience: [WHO YOU’RE WRITING FOR].
Goal: [E.g., drive email signups, build authority, get search traffic].
Create a detailed outline with:
- An engaging intro hook
- 4–7 main sections (H2s)
- Bullet points for each section
- A conclusion with a clear CTA.
Make it beginner‑friendly but not fluffy.”
Paste the outline into the Notion page:
- Update Status → Outlining.
- Adjust the outline manually to match your voice and expertise.
Now you have structure before you ever draft a sentence.
Step 4: Draft the Post with ChatGPT, Then Edit in Notion
With a solid outline, ChatGPT becomes a drafting assistant rather than “the writer.”
Draft in Sections
Instead of asking for a full post at once, go section by section:
“Using the outline below, write the [INTRO SECTION] only.
Tone: [FRIENDLY / PROFESSIONAL / CASUAL].
Length: ~150–200 words.
Here’s the outline:
[PASTE OUTLINE].”
Repeat for each H2. This gives you more control and makes it easier to edit.
Edit and Personalize in Notion
In the Notion page:
- Paste each ChatGPT section under the right heading.
- Add your personal stories, experiences, screenshots, or examples.
- Trim generic phrasing and make sure the advice reflects what you actually believe.
When you’re done, move Status → Drafting or Editing depending on how far along you are.
Step 5: Prepare SEO & Structure Before Moving to WordPress
Before you copy anything into WordPress, finalize structure and SEO basics.
Add SEO Details in Notion
In the same Notion page, add a simple “SEO” section at the top or bottom:
- Primary keyword
- Secondary keywords / related phrases
- Meta description (150–160 characters)
- Suggested slug (e.g.,
/chatgpt-notion-wordpress-workflow/) - Internal links – existing posts you want to link to.
If you want help, ask ChatGPT:
“Based on the post below, suggest:
- A primary keyword
- 3–5 related keywords
- An SEO‑friendly slug
- 3 meta description options (under 160 characters each).
Here’s the draft:
[PASTE TEXT].”
You can then finalize or adjust these manually.
Step 6: Move the Post into WordPress Efficiently
Now it’s time to publish.
Copy From Notion → WordPress
In WordPress:
- Create a new post and paste your content from Notion.
- Turn your main sections into H2s and any subsections into H3s using the block editor.
- Add internal links to related posts by highlighting text and using the link tool.
- Insert images, screenshots, or diagrams where they support the content.
Make sure:
- Title, slug, and meta description match what you planned.
- Categories and tags align with your content pillars.
Once everything looks good, set Status → Scheduled/Published in Notion and paste the final URL into the URL property.
Step 7: Repurpose the Post with ChatGPT (Shorts, Emails, Social)
Your blog post is the “pillar.” Now use ChatGPT to spin off other pieces.
Create Social Posts
Use a prompt like:
“Turn the blog post below into:
- 5 LinkedIn posts
- 5 short tweets/X posts
- 3 Instagram captions.
Each should:- Stand alone
- Include a hook in the first line
- End with a soft CTA to read the full post.
Here’s the blog:
[PASTE CONTENT].”
Paste the results into additional Notion pages or sections (e.g., a “Repurposing” database) so everything stays connected.
Create an Email Newsletter
Prompt:
“Write a newsletter version of this blog post for my subscribers.
Goal: give them value and then send them to the full article on my site.
Tone: [DESCRIBE TONE].
Length: ~400–600 words.
Include:
- A strong subject line (3 options)
- A short intro story or context
- 3–5 key lessons
- A clear CTA to read the full post.
Here’s the blog:
[PASTE CONTENT].”
That email draft can live in Notion until you’re ready to paste it into your email platform.
Step 8: Make It a Weekly, Repeatable System
The power of this workflow comes from repetition, not one‑off usage.
A Simple Weekly Cycle
You can structure your weeks like this:
- Day 1 – Plan
- Use ChatGPT to generate/refine ideas.
- Pick 1–2 posts from your Notion Content Hub and move them to Outlining.
- Day 2 – Outline
- Use ChatGPT to build detailed outlines.
- Adjust and finalize in Notion.
- Day 3–4 – Draft & Edit
- Draft in sections with ChatGPT.
- Edit in Notion, add your personal perspective.
- Day 5 – Publish & Repurpose
- Move the post into WordPress, polish, and publish.
- Use ChatGPT to repurpose into social posts and an email.
Even if you only have a few hours per week, this keeps content moving through the pipeline instead of getting stuck at the “idea” stage.
Step 9: Track Performance and Feed It Back Into the System
Once you’ve published a few pieces, you want to know what’s working.
Add Basic Analytics to Notion
In your Content Hub, add properties like:
- Traffic (30 days) – you can update this manually from your analytics tool.
- Email signups / leads – for posts that drive opt‑ins.
- Notes – what you think made this piece perform (topic, hook, timing, etc.).
Every month, scan your database:
- Identify your top 3–5 posts by traffic or conversions.
- Use those as “templates” and ask ChatGPT for similar angles or follow‑ups.
Example prompt:
“These 3 posts performed best for my audience:
- [TITLE + SUMMARY]
- [TITLE + SUMMARY]
- [TITLE + SUMMARY]
Analyze patterns, then suggest 15 new blog post ideas that build on what’s working, with titles and 1‑sentence angles.”
Bringing It All Together
With a simple workflow like this:
- ChatGPT handles ideation, outlining, drafting, and repurposing.
- Notion keeps you organized with a single source of truth for every piece.
- WordPress becomes the final publishing layer, not a chaotic editing environment.
You stop treating AI as a novelty and start using it as a backbone for a consistent, sustainable content system.
Ready to transform your workflow?
Explore the tools and strategies shared in this post to begin building your own AI-powered project management system today.
For More posts Please look here
For IT Consults please use the contact form